Monday, December 8, 2014

Monday, October 13, 2014
5 Tips for Newbie Landscape Photographers
It doesn't matter if you are a seasoned photographer or a beginner, most photographers want to learn how to make great landscape images. Once you have shot a few hundred sunset shots and a few sunrise shots, you may think you know how it's done. Then you get out into the wild on a crisp early morning, before sunrise, and try and get some dramatic mountain scene or amazing seascape. Suddenly it's not that easy. Landscape photography requires more than simply setting up and waiting for the shot. Sometimes you have to go back to a scene four or five times to get the shot you want.
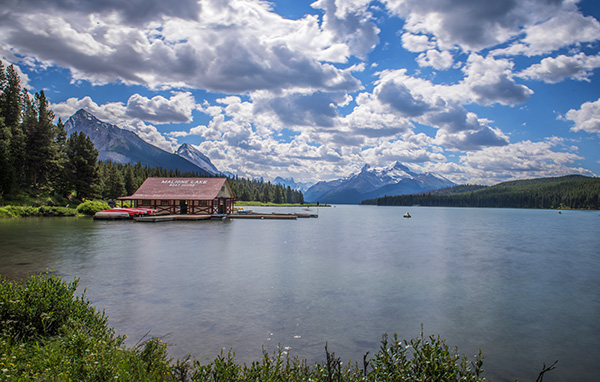
The majestic beauty of the Canadian Rockies
Landscape images can be seductive. When done properly, those viewing the image are transported to that place, they can feel the crisp mountain air or the warmth of the desert. So, you might be asking "How do I get those kinds of shots?" or "I think landscape photography is too difficult, am I good enough?" This article will answer these questions and a few more hopefully. The truth is, landscape photography is not difficult, but it does require dedication and passion. It will often require being up before sunrise, staying out late into the evening, or even early hours of the morning. It also requires good knowledge of your gear. Let's take a look at how you can start getting better landscape images.
1. How to find good landscape photography locations?
Depending on where you live, you may have to drive somewhere to get some great landscape scenes. That may not be far, or you may need to get out of your city or suburb. What I often do before I visit a new place is google the area for dramatic landscapes. I will do a search like landscape scene canadian rockies and see what comes up. Sometimes you will see a vista that you didn't know was in the area and you can start getting some ideas of what you will able to shoot.You can do the same on 500px or even Flickr; do a quick search for the name of the place you are visiting and see what comes up. From there you can narrow down what type of scene you want to shoot. Maybe you want to shoot from the mountain tops overlooking the city, a seascape, or even a forest scene.
Once you have some idea of what you want to shoot you then need to figure out the lighting. My go to tool is The Photographer's Ephemeris. What I love about it is that I can simply drop a pin on a map and immediately see where sunrise and sunset will be, as well as moonrise. It gives me the direction of the sun and what time sunrise and sunset will happen. You can decide what time of day will work best for the shot you are planning.
2. What time of day is best for landscapes?
The Golden Hours are the best time for dramatic colours in landscape photography. You can also use blue hour to make some beautiful shots too; I prefer it for cityscapes, the city lights contrast beautifully off the blue sky. Golden Hour is your guide here. You will need to shoot at sunrise, sunset, or both, but plan beforehand though. There is nothing more frustrating than arriving at a scene, only to find out that as the sun is setting and your subject is in shade. If possible, visit the scene the day before at the time you anticipate shooting and watch where the light moves, that way you will know exactly where to set up your shot.
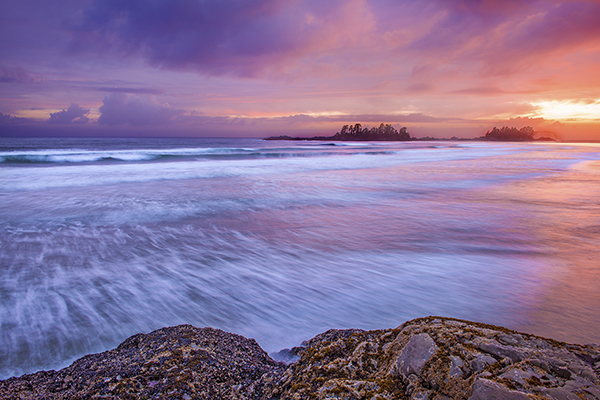
Moving water and a warm sunset make for a great landscape scene
3. What camera gear do I need for landscape photography?
A Camera
Of course, this is a critical part of the whole formula, however, getting great landscape images does not require a 40 megapixel camera. You can shoot landscapes on any DSLR with 10 megapixels and more. The reason you don't want to be shooting landscapes on a four megapixel camera is that you might shoot a great scene. Afterwards, you may want to print the shot nice and big and hang it on your wall, but if the resolution is too low, you may struggle to print a decent size image.
A Tripod
Yes, you will need a tripod. If you are shooting at sunrise or sunset, the amount of light will be minimal. You need to shoot at longer shutter speeds so you need to have your camera on some sort of support. A sturdy tripod will make all the difference. The beauty about a tripod is that once you have set up your composition, you can simply keep clicking away and not worry about composing your image each time, unless you move the tripod.
A Cable Release
I took a while to buy a cable release (remote trigger) when I first started photography, but once I had it, I wondered why I took so long to get one. A cable release allows you much more freedom. You can simply hold it in your hand, stand away from the camera and release the shutter whenever you want. Also, I like to observe the whole scene, rather than just looking through the viewfinder. I connect my cable release (I use a wired one), step away, and start shooting. Be sure that once you have locked focus to switch your camera to manual focus (or use back button focus), especially if you are shooting at sunset. If you don't, what can happen is that as night falls, the camera may struggle to lock focus and this could waste time. The best idea is to set your focus while the scene is still well lit, click it onto manual focus and then shoot away.
Filters
Graduated Neutral Density filters have long been the tool of choice for landscape photographers. This is still largely true, however, in recent years, many photographers have started to do more blended images. What that means is that you will expose for the bright part of the scene and take the shot, you will then expose for the dark part of the scene and take that shot. Very often, the bright part will be the sky and the dark part the foreground. Afterwards in Photoshop, you can then blend the two best exposed shots together. This is a very effective technique in tricky lighting conditions and sometimes can work better than a filter. I use a combination of both techniques. I will take some shots with a filter, then take some at different exposures and see what works best afterward.
The important thing is to make sure you get the best shots while you are out in the field. There is nothing worse than coming back from an early morning or late evening shoot to see that your images did not work out well because you exposed incorrectly. Getting the exposure right in the camera is key. It takes practice, so your first attempts may not be very dramatic. Keep working on it though, you will learn how to see the light, how to use the filters, and how to expose correctly if you practice enough.
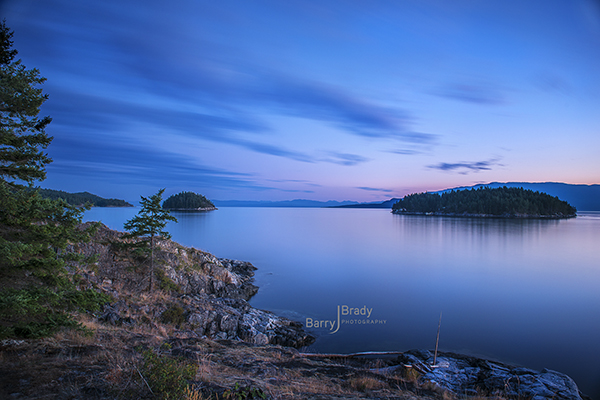
A neutral density filter was used to make the exposure longer and to soften the water
Lenses
For the most part, a wide angle lens will work best for landscapes. You want to capture as much of the scene as possible in your shot to make the image look majestic and sweeping, and a wide angle lens creates that effect. Be careful not to use a fisheye lens; the distortion may not work well in a landscape shot. When you use a wide angle lens, it is a good idea to have foreground interest, that means, have something in the foreground that anchors the image. If you don't have foreground interest, thats okay, you can still get some good shots. You will find though, the images with foreground interest tend to work better. You may also want to shoot landscape images with a zoom lens. This can work well, but not on every scene. Try it out, but if it's not working, switch back to a wider angle lens.
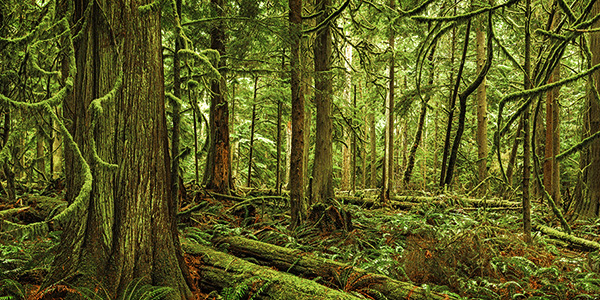
This was not a wide angle shot, but it still works well
4. What settings should be used?
Exposure settings
There are no formulas for how to get the best landscape shot; there are a few guidelines though. First, you will generally want everything in your scene to be in focus. That means your aperture should be at f/8, f/11 or f/16. Once that is set, then you will need to set your shutter speed accordingly. You may have to take your shutter speed down to a few seconds to get a properly exposed shot. Thats okay, it adds to the image. Long exposures work really well when there is moving water or clouds in the scene; the water becomes soft and silky as do the clouds. Sometimes, the trees in your scene may wave in the breeze and the blur from that can work well too.
Another setting to look out for is your ISO. I recommend not to shoot in Auto ISO. This will create all kinds of problems especially at sunset. Your camera will see that the light is fading and it will simply bump up the ISO to compensate for the loss of light, this may result in digital noise, not very good for your landscape scene. Set your ISO to 100 (or as low as your camera goes) and keep it there. Only adjust your shutter speed to make sure you get the shot and of course, you will need to be on that trusty tripod!
White Balance
This is a creative choice. Start out shooting your scene in daylight white balance. Avoid using auto WB as this function will try and neutralize the colours in your scene. You want as much colour depth in your scene as possible, so start off with the daylight preset. You can then use the white balance creatively, for example, using the Fluorescent preset will add magenta to your scene, Cloudy and Shade will add orange or red, and Tungsten will add blue. If you want to emphasize any of these colours in your scene, switch to the WB that will boost that. So, if you are shooting a sunset, use cloudy or shade to boost the reds and oranges. If these don't work well for the scene, stick to daylight as it will render the colours in the scene correctly.
5. What's next?
Once you return from your shoot, download your images and take a look through them. Normally, you will be doing this very late at night, so it is best to leave them until the next before you start editing them. Whatever your editing suite of choice is (Lightroom or Photoshop) you can get to work on them there. If you have shot some bracketed shots, you can do all that blending in Photoshop. The only guideline here is to take your time editing the images. Choose only the best images to be edited. You may find that you will shoot 100 images but only three or four are worth editing, thats okay. Edit only the best images and spend time making them look as dramatic as the scene you saw! For some quick tips on how to get your images to pop take a look at this article, you can also browse through this list of articles on Photoshop to get some in depth techniques.
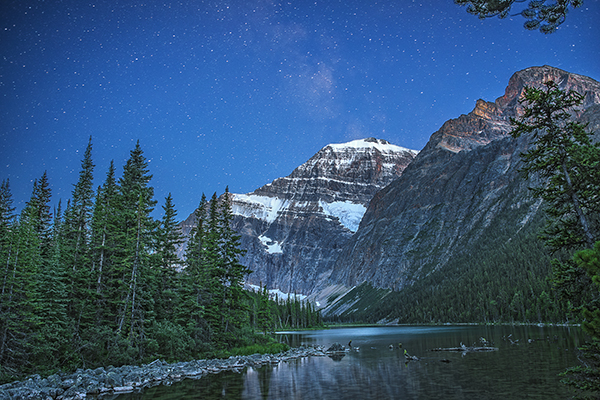
A blended shot, the foreground was shot earlier in the evening and the stars much later. This was blended in Photoshop afterward.
So, to wrap it all up, landscape photography is a combination of skill and patience. Skill takes time to develop, and patience enables you to wait for the right scene to unfold. In this fast paced digital life, there is something calming about shooting landscapes. You have no control over the weather, you have no control over the light, you simply have to be there, and press the shutter release if the conditions are right. The beauty is that, if the conditions do work out, the reward will be unreal. You will have some great images and you will have spent some quiet time in nature, enjoying a beautiful sunrise or sunset. The most important tip is to take your time. Don't rush the process, don't pack up until you are certain you cannot get a better shot than the last one you just made. Always go out and have fun, even if the light doesn't play along or the weather is not what you hoped for, use it as a practice session and pretty soon, you will be capturing those breathtaking scenes with ease!
The post 5 Tips for Newbie Landscape Photographers by Barry J Brady appeared first on Digital Photography School.
Monday, June 2, 2014


Monday, May 13, 2013
What’s In My Bag- Landscapes
I’m often asked by beginning photographers about what I use to shoot my photos, whether it’s landscapes, portraits, sports, or some other subject. Most often, they are referring to the camera used, the lenses, maybe the flash. But the truth is that there’s more to taking great photos than just the camera. The truth is, the contents of my bag changes dependent on what I plan to be shooting. I’ve compiled a list of items that are always in my bag when I’m on a landscape photo outing, along with how they’ve helped me in my quest for better photos.
1. My Three-Legged Friend

Without a tripod and neutral density filters, I couldn’t possibly hope to capture this image. Using a 6-stop ND filter, exposure was ISO 100, 10 seconds, at f/16.
The truth is, I’d be lost without a tripod on a landscape outing. I currently have two I use regularly. Which ones I use is far less important than the process of choosing a tripod. Too often, beginning photographers skimp on the tripod purchase, going for something cheap that doesn’t suit their needs, and in the end, their images suffer. First and foremost, a tripod needs to support the weight you plan to put on it. This means taking the total weight of your camera and heaviest lens, and making sure your tripod will support that weight. The fact is, a heavy tripod will better support the weight you put on it, but in today’s world a premium is put on lighter weight. Carbon fiber tripods are lighter weight and generally support heavier loads than aluminum tripods, but at a higher expense. One of the tripods I use is a Manfrotto XPro B, with an Arca Swiss B1 ball head. This tripod and head combination weighs over 6 lbs., but is rock solid in any conditions. The tripod legs are rated to support 15.4 lbs, and the head is rated to support over 90 lbs! My other tripod is a Gitzo 1541T Traveler with an Acratech GPss ball head. The legs are rated to hold 17.6 lbs, and the head is rated to hold 25 lbs. This is a smaller setup that folds down to about 20″, and weighs less than 3 lbs. This is what I use when I fly, or when I am hiking longer distances. The thing to realize about a tripod is that a good one is built to last. If you take care of it, a tripod can last a lifetime of shooting.
2. Stepping Up A Level

My trusty bubble level always reminds me to be sure my camera is straight. Nothing annoys me more than a crooked horizon line!
These days, just about every DSLR out there has a built-in electronic level, a feature I simply LOVE. However, sometimes in the heat of the moment I will simply forget to level my camera properly, since the built-in level isn’t always visible on the screen. Because of this, I still carry a hot-shoe mounted spirit level in my bag. It’s hard to miss it sitting on top of the camera, and it always reminds me to be sure the camera is level. And yes, while some tripods do have levels built-in, they aren’t always easy to see, and depending on where they are mounted, it may indicate the legs are level, but doesn’t mean the camera is level because the head can still tilt.
3. Filters
I’m a big fan of using neutral density filters and graduated neutral density filters for landscape work. I have a set of Schneider filters that I use with a Lee filter holder. The Schneider filters are not cheap. They are optical glass, heavy, and high quality. There are more economic options available in Lee-style filters, including Cokin, Formatt, and Lee. The filters I use are 4 5 size, which allows me to adjust the horizon on the graduated filters based on my composition. My kit consists of 3-, 4-, 5-, and 6-stop ND filters, and 2-,3-, and 4- stop grads, which come in both hard and soft-edged styles. Which style you use is dependent on the scene in front of you. I also have a circular polarizer I use often for controlling reflections and cutting haze.
4. Flashlight
I often find myself shooting before the sun rises, and after the sun sets. This means hiking to and from my location in the dark. A flashlight can be a lifesaver in these situations. In addition, at times I go out to shoot night landscapes, to get stars in the sky, or the moon. If there’s no light in the foreground and I’d like some, a flashlight is the perfect way to paint some light back in. I also carry a headlamp in my bag so I can work handsfree and have a light on while digging around in my bag.
5. Step-Up Rings
When you have lenses that have different diameter front elements, it can be maddening to have to buy filters for each lens. An easy workaround for this is to buy step-up rings. I have a complete set that covers from 52mm up to 82mm. I then simply purchase the filter for the largest lenses I own and use the step up rings for smaller lenses. Much easier and more cost effective than buying filters to fit each lens.

For this image, I used a 4-stop hard edged ND grad, to bring the sky back within the dynamic range of the camera. I used the hard edge here because there was nothing intersecting the horizon from the foreground, which made it very easy to line up the darkened edge with the horizon out on the bay. Exposure was 1.3 seconds, ISO 100, f/16. EOS 5D Mark II with EF 17-40 f/4L.
Post originally from: Digital Photography Tips.
Check out our more Photography Tips at Photography Tips for Beginners, Portrait Photography Tips and Wedding Photography Tips.
What’s In My Bag- Landscapes
Thursday, July 26, 2012
Nothing Would Be Finer …

Don’t forget to stop by LBJ’s family ranch near Johnson City, the next time you’re wandering through the Hill Country. The Pedernales River runs deep and smooth in this region and it’s a perfect spot for a picnic lunch.
Tuesday, July 24, 2012
Outstanding Landscape Photos by Photographer Michael Breitung
Convergence

Anse Severe

St. Peter Ording


Saturday, July 14, 2012
Marvelous Aurora Borealis or Northern Lights Pictures
Outlined in this article a number of us put on show Great Upper Signals Photographs taken with Alexander Semenov of your Bright Coast, The ussr. Alexander succeeds found at Light Underwater Biological Sta and also he?ˉs the actual top for Research Divers team.In real life Auroras seem to be 1001 days a lot more attractive than the others N . Your lights images. Enjoy ! these types of images will inspire consequently making you visit Northern Devices (Aurora Borealis) designed for wonderful life knowledge.


