Wednesday, November 26, 2014

How to Buy Used Camera Gear


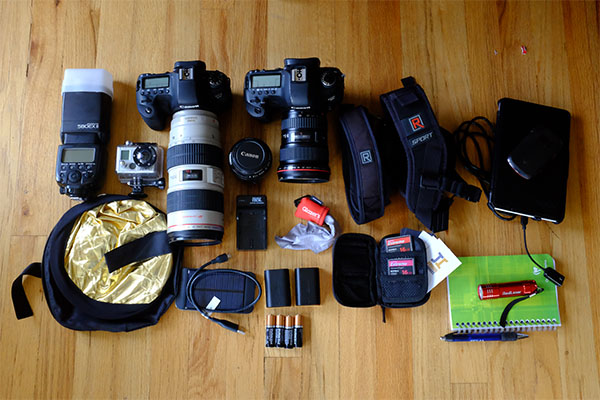
Even though the prices of digital photography equipment continue to fall significantly, it can be a tough to dole out a thousand plus dollars on a brand new camera or lens. On the positive side, camera gear (especially lenses) retains its value really well. As a result, there's almost always a surplus of used camera bodies, lenses, and accessories. Before you take the plunge and buy used gear, be sure to understand that used equipment can be a bit tricky to assess in terms of quality and price. As a photographer who shamelessly has about 50% used gear in her collection, here are some methods I run through when contemplating a used camera purchase.


How to buy used photography gear


Price check used items on reputable online sources


By now, just about every online camera retailer has a used section on their website. Availability of items is obviously variable, but a simple item check can pull up estimates for the current standard used prices of the items you want. Be sure to note the quality rating and commentary of each item, and see how it matches up to your expectations. Often, used items that are priced too low have some sort of cosmetic or mechanical problem, so if you think you're getting an amazing deal, get suspicious. Another reason to be suspicious of outrageously low prices is that they might be grey market items, which essentially come with no factory warranties. The best way to check if it's a grey market item is to find the serial number and reference it in the camera maker's database.


The advantage to buying used gear online is that often the gear has been checked out and issued a rating by the retailer. There may also be some flexibility in terms of exchanges and returns in case you aren't happy with your purchase. Be sure to double check and make sure you know who the seller is, especially on Amazon, which allows private sales to be made.


  • Amazon Used Camera Section
  • Keh.com
  • B&H Used Camera Section
  • Adorama Used Camera Section

Used lens 03


Check out the local classified ads


Scan local communities boards or publications, or see what's listed in your local Craigslist directory. The advantage to buying used gear in-person is the ability to test the gear out before you buy it. Nervous about meeting a stranger for a business transaction? Choose a meeting place at a super public space like a mall or cafe. Also, I've found that many Craigslist sellers of camera gear in my area tend to be other professionals, and thus their names and corresponding web portfolios can be easily researched online prior to meeting in person. If you do opt for an in-person transaction, be clear on how to assess used camera gear yourself.


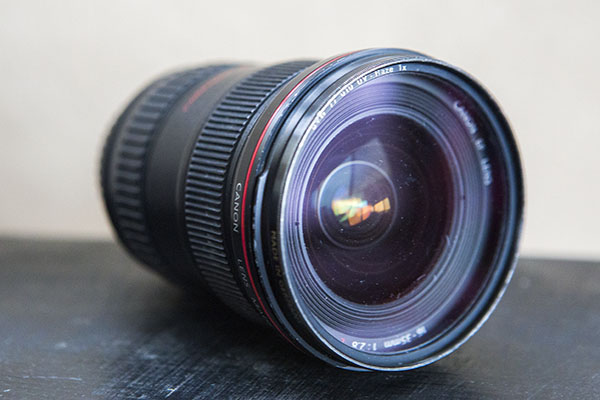
How to Determine Used Lens Quality


Used lens 02


Lenses are relatively straightforward to assess in terms of quality. First, investigate the lens thoroughly and watch out for common problems such as fungus, dust, and scratches. Shine a light through the lens, and any imperfections should be visible. Note that some problems such as dust and small scratches will likely just be cosmetic damage and should not affect overall image quality. However, any signs of fungus on the lens is a deal breaker as it is incredibly difficult and costly to remove.


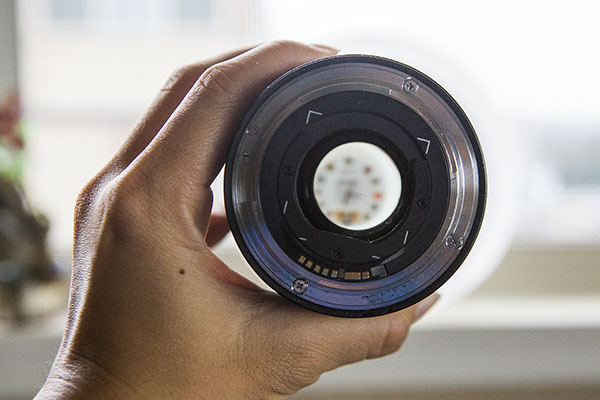
Second, do a mechanical test of the lens to see how it performs. It's best to have your regular DSLR with you to see how it fits. Make sure the aperture blades on the ring are clean and can move freely, and try out both the zoom and focus rings. Depending on the lens model, it's not uncommon for the rings to offer some resistance, but be sure sure they both operate relatively smoothly. Finally, check out the autofocus operation on the lens and make sure it is smooth.


How to Determine Used Camera Body Quality


Used camera 04


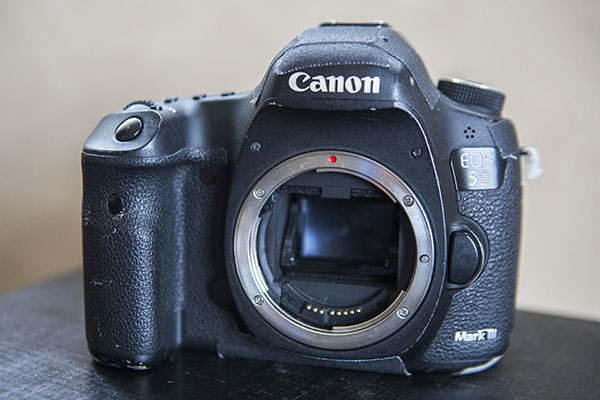
Used camera bodies can be a bit trickier to assess. While it's perfectly normal for bodies to have physical signs of wear and tear, use your initial visual impressions of the camera as your first judgement. If the camera appears badly worn and used, it's likely not looking any better on the inside. However, the most telling part of the camera body's lifespan is the shutter, which is very expensive to replace. Sometimes people will sell their cameras when the shutter is about to die, meaning the new owner will have to drop a lot of extra money soon after to replace it. How to check shutter counts, as well as how many shutter counts are acceptable for a used body, depend on the camera make and model. Google searches and forums should offer some resources.


Autofocus is another aspect of the camera body that should be tested. Using a reliable lens that you bring with you, test out the camera and see how both single and continuous autofocus performs. While you're at it, also examine the lens mount on the camera and make sure the lens mounts securely.


Whether you're an amateur or a professional, it's completely acceptable to purchase used camera gear. Just be sure to do your research and have a thorough understanding of the product you are considering buying. Always use reputable sources, and remember that if the deal seems to good to be true, it probably is!


The post How to Buy Used Camera Gear by Suzi Pratt appeared first on Digital Photography School.


Tips for Using Shutter Speed Creatively


Shutter speed is one of those things that is initially a problem to be solved, but once you do that it becomes a tool that allows you to take better and more creative photos.


First you should understand how shutter speed works and how to change it. You will need to make sure it is fast enough that your pictures turn out crisp. But once you've mastered those things, you can start using shutter speed to your advantage. You can slow it down to create a sense of movement, or speed it up to stop the action.


GreyWhale


Grey Whale Cove: 1/4 second at f/16, ISO 100


This article will show you the basics of what you need to know regarding shutter speed and get you started with some creative effects using different shutter speeds.


What is Shutter Speed?


Shutter speed is simply the amount of time the shutter inside the camera is open, allowing light onto the digital sensor to expose the picture. The longer you hold the shutter open, the more light is let in to the camera to expose the picture.


But holding the shutter open longer than a tiny fraction of a second has consequences. The camera must be held completely still during the exposure or the picture will be blurry. Without using a tripod or some other means of support, you cannot hold the camera still for longer than about 1/60th of a second and blur will start to creep in to the picture (more on this in a second).


Shutter speed is recorded in fractions of a second. So a shutter speed that says 1/60 (it may just show 60) means that when you take the picture the camera will open the shutter for 1/60th of a second. Most cameras have shutter speed ranges between 1/4000 of a second (on the short side) and about 30 seconds (on the long side). In addition, many cameras have a Bulb mode that allows you to hold the shutter open as long as you wish.


Make Sure Your Shutter Speed is Fast Enough


One of the first issues you will confront as a photographer is making sure your shutter speed is fast enough. If you have a tripod, this will not matter as much and you can leave the shutter open a long time (sometimes even several minutes). But assuming you are hand-holding your camera, a long shutter speed will introduce camera shake and make your image look blurry.


But how fast is fast enough? There is something called the Reciprocal Rule designed to help you with that answer. This rule states that your shutter speed should be at least the reciprocal of your focal length. That sounds complicated, but don't worry it is easy to figure out. You just put a one over your focal length and that is your minimum shutter speed. So, for example, if your focal length is 60mm, just make sure your shutter speed is 1/60th of a second or faster. If you are zoomed in and your focal length is 200mm, make sure your shutter speed is 1/200 of a second or faster (remember to consider lens factor as well if you have an APS-C sensor) Any slower than that and it is time to break out the tripod (or raise open your aperture and raise the ISO).


Beam


1/200th at f/2.8, ISO 3200


Changing Shutter Speeds


The next question you will confront is how to change your shutter speed. The actual physical changing of the shutter speed is pretty simple, it's typically done via a dial on top of your camera. The more important question is how are you to offset the change to shutter speed, assuming you are in manual mode (if you are in Aperture priority or Program mode the camera will make the change for you).


If you use a faster shutter speed, the shutter is not open as long so the camera gathers less light. So, without something else changing, your picture will be underexposed by using a shorter shutter speed. To make a proper exposure, additional light has to come from somewhere. You can add that extra light to offset the use of a faster shutter speed in one of two ways:


  1. Open up the aperture: The aperture is the hole your the lens that allows light to pass into the camera. A larger aperture allows more light into the camera. So if you open up your aperture by one stop, you are letting in twice as much light during the same period of time. But be careful, a larger aperture also creates a shallower depth of field, which you might not want.
  2. Increase the ISO: The ISO is the rating assigned to how sensitive your digital sensor is to light. It is adjustable, and the higher the number, the more sensitive you make your camera's digital sensor to light. But this comes at a cost, digital noise, which increases as you increase the ISO.

There are separate controls on your camera to make these changes. Use either of these methods to add more light to your exposure whenever you are shortening your shutter speed.


Using Shutter Speed Creatively


Now that you understand shutter speed a little bit, you will want to put it to use creatively. There are several ways to do this, and we will work through some of them from the faster shutter speeds to the slowest.


Stopping the Action


In times of high action or drama, you can stop the motion by using a very fast shutter speed.


To do this, you will want your shutter speed to be 1/250 of a second or faster. At times, like with the picture below of the water droplets being flipped through the air, you may want the shutter speed to be significantly faster. This particular picture was shot at 1/8000th of a second.


Water


1/8000th at f/2.8, ISO 250


Accomplishing shutter speeds this fast, even on bright sunny days, will require offsetting moves. For example, you will need to open up the aperture to its widest setting. Doing so will result in a shallow depth of field, but in this sort of picture that usually won't matter. You will also probably need to increase the ISO (a little on bright days, a lot on cloudy days or indoors).


Another key for these type of shots where you are stopping the action, is to anticipate the shot. With the speeds at which modern cameras shoot, you may often want to just hold the shutter button down and blast away, this rarely works though. The decisive moment is usually only captured by anticipation and triggering the shutter at precisely the right moment.


Panning


Another way to use shutter speed creatively in times of action is to pan the subject. Panning is where you move the camera during the exposure to follow the subject. Done properly (or when you get lucky) the subject is relatively sharp, while the background is blurred and conveys a sense of motion.


LondonCabPan


1/15th at f/7.1, ISO 50


Accomplishing this is usually best at slower shutter speeds between 1/8 and 1/30 of a second. Being able to slow down the shutter speed is typically welcome news, as it will mean you do not have to crank up your ISO, or make other offsetting moves. Getting a good result will frequently require at least a few attempts, while you gauge the speed, and other settings.


If possible, get your exposure set up before you attempt to pan. That way you are only thinking about the panning during the shot, as opposed to worrying about all your other settings.


Creating a Sense of Motion


Still another creative use of shutter speed is slowing it down to create a sense of motion. This is accomplished when the subject is moving slightly through the frame during the exposure. This idea is for the subject to be identifiable, but slightly blurred.


GreyWhaleRock


1/4 second at f/16, ISO 50


Shutter speeds for this type of shot are between 1/4 and 1/10th of a second. That is virtually always too slow for you to hand-hold your camera, so you will probably need to break out the tripod for this type of shot.


Long Exposures


The final creative use of shutter speed we will cover here is a long exposure. This is where you hold the shutter open for a long time and allow certain parts of your picture to move through the frame. You will always need a tripod for this technique.


DavenportRock


20 seconds at f/8, ISO 400


Long exposure shutter speeds are between 10 and 30 seconds. Most cameras offer you the ability to go even longer by using Bulb mode, where the shutter will stay open as long as you hold the shutter button down. A remote shutter release, which is always a good idea when you are shooting from a tripod, is almost a necessity for this type of shot.


Long exposure is a great technique whenever there is moving water involved, such as coastal scenes, rivers, and waterfalls. It is also great for streaking lights in night photography.


Whereas most of the time, your challenge with shutter speed is to get enough light into the camera; in this context getting the shutter speed you want usually involves the opposite problem. The challenge is to limit the amount of light entering the camera so that you can leave the shutter open a long time without overexposing the image. To do that, first close down the aperture to its smallest setting and use the lowest ISO setting on your camera. The lowest ISO setting is usually 100, but some cameras contain an expandable ISO range that will allow you reduce the ISO further, so be sure to check your camera's menu for that.


But if those moves don't restrict the light enough, you will need to use a neutral density filter. These are filters that restrict the amount of light coming into your camera. They come in different strengths, with typical values between two and 10 stops of light. Get one of these (or a few different strengths) and keep it in your bag if you think you will have any long exposures in your future.


Guadalupe


15 seconds at f/8, ISO 500


Conclusion


Once you have mastered the basics of shutter speed, it is a great tool for adding creativity to your photography. It is perhaps the most effective way to make our photos more interesting. So lock down the basics, and then give some of these techniques a try.


The post Tips for Using Shutter Speed Creatively by Jim Hamel appeared first on Digital Photography School.